Lucidchart online is a great tool, for making UML diagrams. Making Diagram on Lucidchart is very easy. It has different shapes and symbols which are used in flowchart.
So, basically you can draw any kind of diagram using lucidchart like: Data flow diagram, activity diagram, sequence diagram, class diagram etc.
Lucidchart is a paid tool, you can check current Lucidcharts pricing on its official website. Lucidchart for students is a good tool to making different UML diagrams for their academic needs.
It provide you an option to import you diagram from visio to Lucidchart. This features allows you to easily switch on Lucidchart.
Checkout: Data Flow Diagram Examples
Steps to make data flow diagram on Lucidchart online
You can draw any DFD on Lucidchart in just few steps. Let’s see the steps to make DFD on Lucidchart.
1. Register with Lucidchart
In the first step we have to select a subscription plan and register with Lucidchart. Lucidchart cost depends upon the subscription you have selected.
There are basically 4 type of subscriptions: Free, Individual, Team and Enterprise. Each of them have different benefits. Lucidchart pricing for Enterprise subscription is not fixed, you need to contact with them for a quote.
You can select any of these according to your need. Here we have selected Free subscription.
Now click on continue with free and provide your email, name and desired password.
2. Select a Data flow diagram template
Now you can create Lucidchart either from Template or you can select Blank document. Here we have selected Blank document.

If you don’t find required shapes. Then click on Shapes button.

A new window will open. Now you can select your required shapes from the library.

3. Renaming blank diagram
You can rename blank diagram. Just select Rename from the file menu.
4. Add an external entity that starts the process
After naming you DFD grid screen appears and over the left side you can see there are many symbols and flowchart shapes panel. The functions appear on the top.
Now drag the external entity to grid screen. You can double click inside and type the name you want.

5. Add a process to DFD
You can drag the symbols to the grid space and name them as per requirement as in here we are going to name it as “customer” and “add to cart”.

6. Add data store to the diagram
In side bar you are going to find data store symbol, drag it to grid screen and name it. Here we are going to name it as “shopping cart”.

7. Continue to add items to DFD
As you know side bar contains many symbols such as data stores, processes, external entities etc. you can use suitable symbols for your DFD by dragging them and placing them where you want.
You can also resize the symbol and grid screen helps in positioning the symbols.
8. Add data flow to DFD
If you double click on the entity, orange circles will appear around it. Click on one of orange circle and you can drag the line to other entities.
9. Name the data flow
Once you have added the data flow process you need to name it. So, double click on the arrow line and type text will appear. Here you need to write name of the data flow process.

10. Customize the DFD with colors and fonts
Even after creating basic design of the DFD you can adjust arrows or change fonts of the diagram. You can also add colors to the symbol by clicking on symbol and adding fill color option from top menu bar.
To color all entities as same color, hold shift key and click on all symbols and then click on fill color option.

To make changes in font go to edit option in menu bar. There you will find many options to change font in to bold or italics etc. There is also alignment option, text option and you can also change font size, and font colors.

To adjust arrow style, click on particular arrow line and select end point arrow icon in menu bar on top. Now you can select different type of arrow styles.
11. Add a title and share your Data flow diagram
In shapes and symbol column there is T.
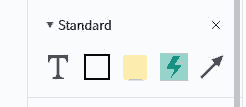
You can drag it to grid screen to add title to your DFD. You can also adjust the size of the title font or change color of font using short keys from edit option in menu bar.
Once you complete the DFD you can easily download or share it. For downloading the diagram select Export from file menu and select your desired format ie. Pdf, png, jpg etc.
You can also share it with other groups. There are many options to share link, you can use share tab in menu bar.

Once you click on share button you can invite collaborators and co workers to work on the DFD by sharing link. You can also copy shareable link and share it to your members.
Now you have done. Lucidchart is a web based app and one of the easiest way to make data flow diagram online. As a beginner you can signup Lucidchart for free and see how easy it is to use.